Last Updated on by Eddie Kremanis
What’s that? You’re worried that your WordPress site is not converting well enough?
Do you think that people don’t completely understand what your site is all about when they land on the homepage, or any page for that matter?
In that case, you need a welcome mat.
I know, I know. It sounds like another plugin that’s going to clutter up your site, but believe me, this is an essential part of launching your online presence to new levels. And it’s free.
What’s the Big Idea About Having a Welcome Mat on Your WordPress Site?
To start this conversation off, it’s nice to look at some examples of welcome mats from individuals and organizations that use them. We picked from some rather popular sites to show that the most successful bloggers, online stores and other businesses know that conversions are more likely to come their way when using a welcome mat.
To start off, we have the QuickSprout homepage, which presents a welcome mat asking for user URLs. This is a unique take on the welcome mat because it’s trying to get people into a sales funnel where QuickSprout accesses user analytics data to help them in the future.

The next welcome mat is on Jeff Goins’ website, where he explains what the website is all about, while also asking for an email address.
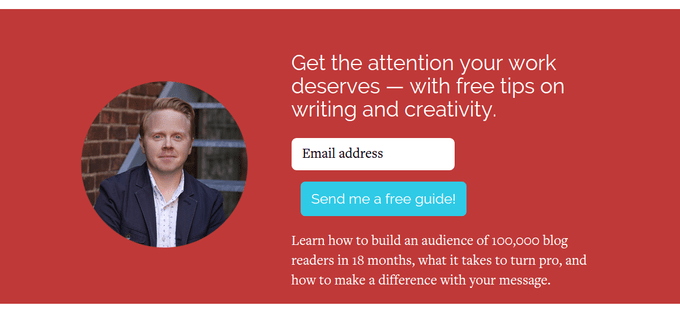
Michael Hyatt has a similar welcome mat, but he lists his accomplishments (building credibility,) while also providing a button for people to download a free guide to shave time off a workweek.

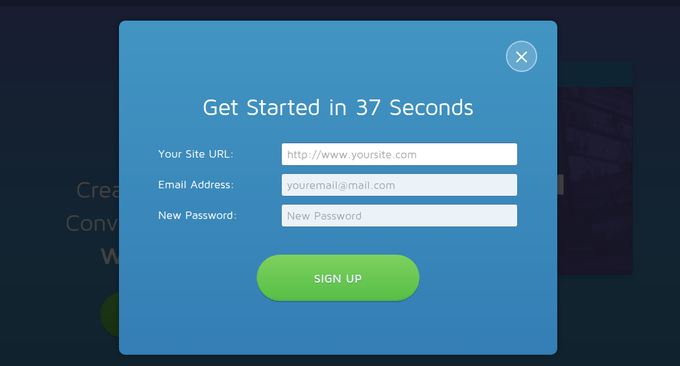
Finally, the SumoMe company (creator of the welcome mat plugin we’re going to use) requests a site URL to analyze how users can improve their site traffic.

You’ll notice a few areas that are similar in each of the welcome mats:
- They all have a minimal amount of text.
- They all provide visual elements.
- Each of them take up the entire home screen.
- Each welcome mat is trying to accomplish something (whether it be acquiring email addresses, URLs, etc.)
- Call to action text is included with bold headers and short descriptions.
So what’s the big idea about welcome mats? What’s the point of having them on your website?
First of all, they are proven to boost your conversions, whatever they may be. However, they also encourage you, as a webmaster, to have a goal with your homepage. If you’re simply running a blog without a purpose, you can’t expect to achieve much success.
So, it’s essential to figure out whether you’d like people to share your page on social media, hand over their email addresses, download a free item or buy a product.
The welcome mat serves as a way to immediately portray what users can expect on your website, while also accumulating information from interested parties.
One of the more common arguments against having a welcome mat is that it seems like it would annoy users. Sure, that may be the case, but it’s a small price to pay for the amount of conversions it accumulates for you.
How Can A Welcome Mat Improve Your Conversions?
The welcome mat is simply another term for a full screen splash screen, popup module or even a more simplified landing page.
Even though website visitors report that they prefer not to have to X-out of a welcome mat or splash screen, websites typically report a doubling or tripling of conversions upon the implementation of one.
This is a huge improvement, and if someone is so turned off by a welcome mat that they never come back to your site again, they probably weren’t going to become one of your VIPs in the first place.
How to Create a Welcome Mat For Your Own WordPress Site
You’ll find a few options for welcome mats, email subscribe form popups and other similar plugins, but we’re going to use the SumoMe Welcome Mat solution for this tutorial.
Why? For a few reasons:
- It’s completely free. (With an optional premium version)
- It can double, or triple, your conversion rate.
- The design is fully customizable.
- A/B testing is an option.
- Mobile support is provided as well.
Step 1: Download the SumoMe Welcome Mat App and Install It

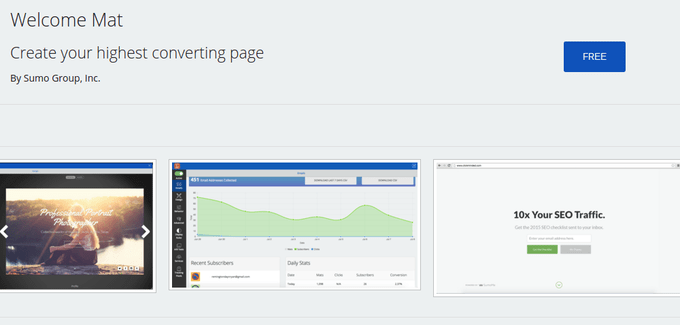
Click on this link to navigate towards the SumoMe Welcome Mat landing page. This area explains many of the features and benefits of the Welcome Mat, so feel free to browse around if you would like.
Select the large, green, Try It Free button.
This brings up a popup that prompts you to punch in your site URL, email address and new password. Make sure you use a real email address and make your password strong so people can’t get into it. The last thing you want is a hacker changing the message that welcomes people to your site.
After all of your information is filled in, click on the Signup button.
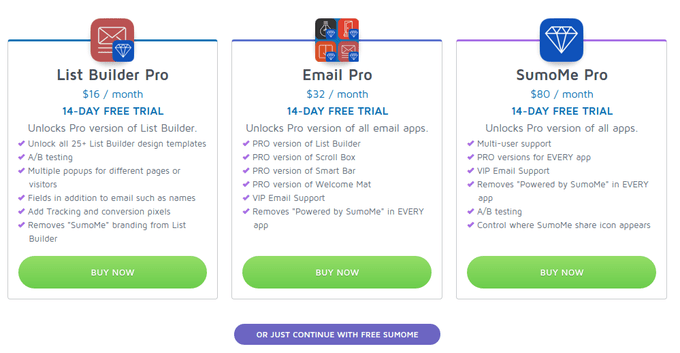
The next screen may surprise you, since it looks like you have to pay for a plan. The three SumoMe plans are pretty solid, and you can test all of them out with the 14-day trial. However, most of the Welcome Mat tools are provided with the free version, so click on the button at the far bottom of the page. It reads “Or Just Continue With Free SumoMe.”
The final installation step requires you to copy and paste a bit of code into the <head> of your site HTML. You also have the ability to go through the one-click WordPress installation, which you can see right below the code.
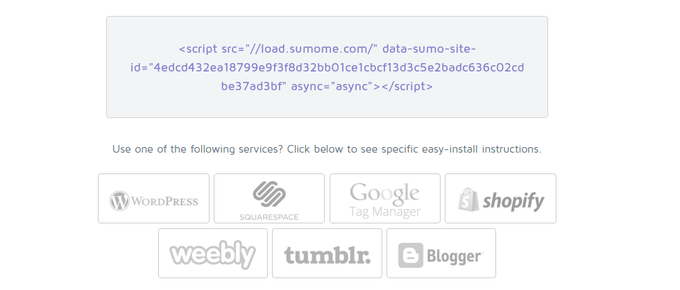
Although this tutorial will cover the WordPress installation, SumoMe has one-click installs for the following platforms as well:
- Squarespace
- Google Tag Manager
- Shopify
- Weebly
- Tumblr
- Blogger
As stated, copying the code into the <head> of your HTML is an option, but there’s really no point considering you have a much easier path with the one-click installation.
Therefore, click on the WordPress button.
Select the Install SumoMe button.
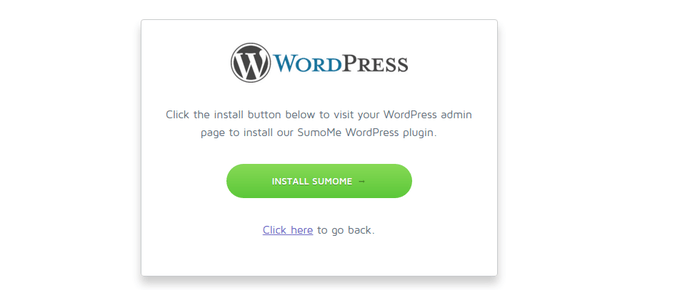
Side Note: If you’d rather install the SumoMe plugin yourself, feel free to download it right here.
After selecting the Install SumoMe button, this redirects you to the backend of your WordPress website. You may have to login to the dashboard.
Select the Install Now button, then click on Activate plugin on the next page.
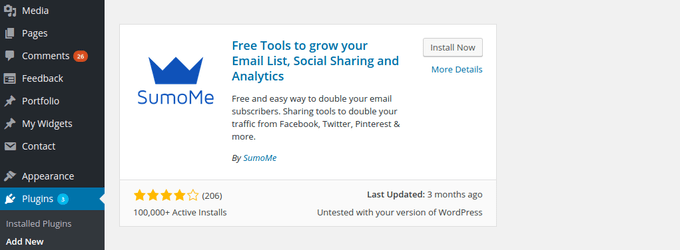
Congratulations! The entire SumoMe plugin is now installed and activated on your dashboard.
Step 2: Register Your SumoMe Account and Install the Right App
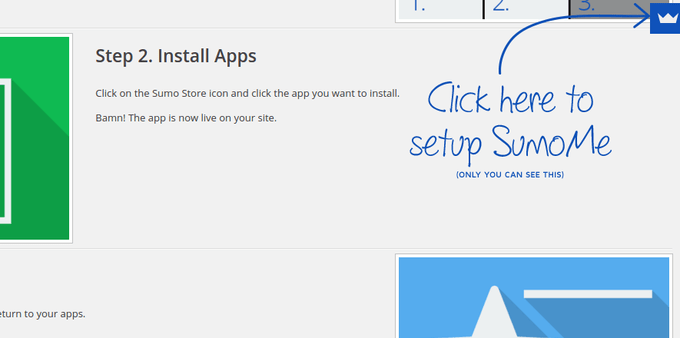
If you look to the left hand side of your WordPress dashboard, you’ll notice a new SumoMe tab on the taskbar. Click on this.
Several step are presented for you to walk through, but you don’t have to follow those. Go to the right side of the screen and scroll over the blue writing that says Click Here to Setup SumoMe. This reveals a blue crown that scrolls out from the side. Select that crown.
Since you already created a SumoMe account on their website, login to your account with your email address and password.

Push on the Login button after that.

Use the dropdown menu to locate the site you’d like to activate. Then click on the Activate Now button.
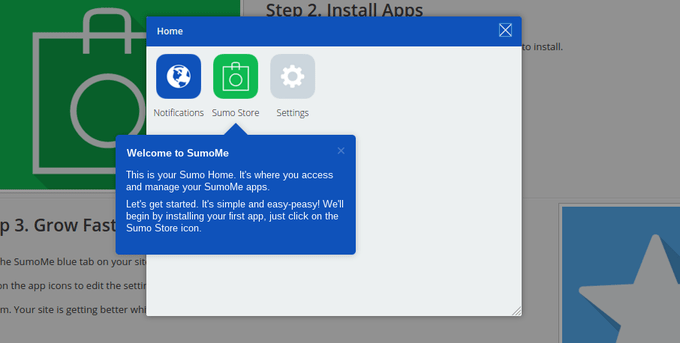
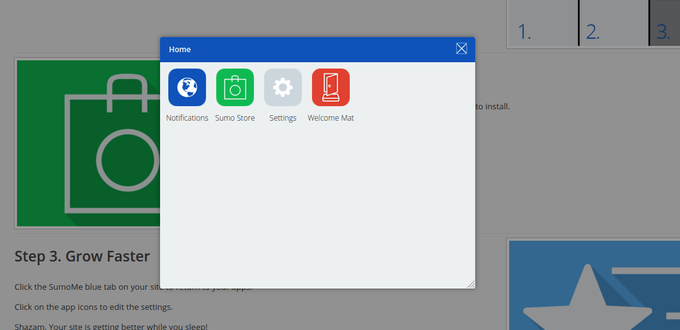
This brings up a module with a few options. You can change your Settings if you want, but the main button you’ll want to push right now is the Sumo Store. This is where you can activate some of the various SumoMe apps they have available.
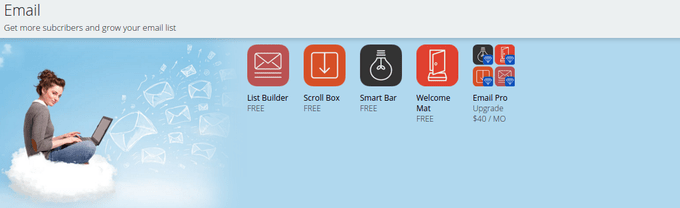
Once you get into the Sumo Store, you’ll see the free Welcome Mat option at the top. After this tutorial, you can test out some of the other apps such as:
- List Builder
- Scroll Box
- Smart Bar
- Email Pro
- Heat Maps
- Highlighter
- Welcome Mat Pro (If you’re looking for more features with the Welcome Mat)
However, right now all you need to do is click on the free Welcome Mat icon.
Select the blue Free button to the far right side of the new page.
After that it should bring up a short message that indicates that the Welcome Mat has been installed on your website.
Step 3: Design Your Welcome Mat
Exit out of the installation page, and go back to the SumoMe home module. Click on the new Welcome Mat icon to proceed.
Another popup may reveal itself to try to get you to pay for one of the plans. Skip over this by continuing with the free welcome mat. Now you’ll see a page with several tabs on the left hand side. The red switch indicates that the welcome mat is not yet live on your site.
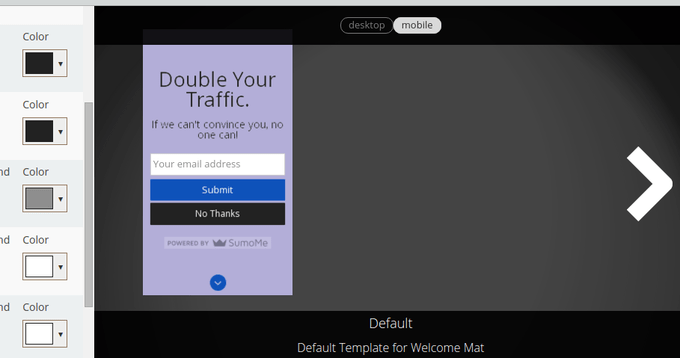
Go to the Design tab. Select one of the templates for your design. Keep in mind that most of the templates are only provided with the paid version. However, you can make some solid customizations to achieve your branding needs through the free version.
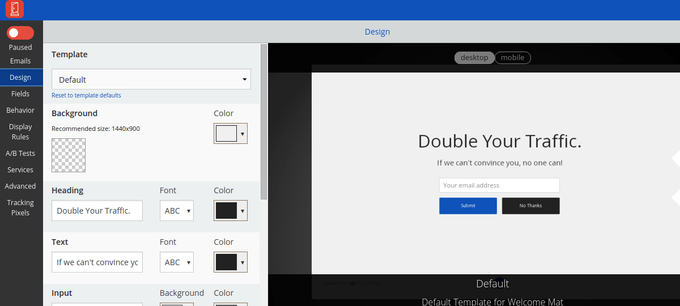
Although some of the more advanced features (like the custom background images) are premium options, you can configure the following areas to make the welcome mat look the way you want it to:
- Background color
- Background image
- Heading
- Text
- Fonts
- Colors
- Input field text
- Optin Button
- Opt out button
- Close button
Remember: The system has a mobile view for you to toggle into. Test this out before making your welcome mat live.
Finally, after you modify something on every single one of these tabs, make sure you click on the Save button towards the bottom right hand side of the popup module. Otherwise nothing gets saved when you move to the next tab.
Step 4: Customize the Fields
This is a premium feature, but it’s worth looking into if you plan on going that route. Most webmasters will simply want to grab an email address from users when they land on your website. However, you have the option to ask for items like names, phone numbers, URLs or even physical addresses.
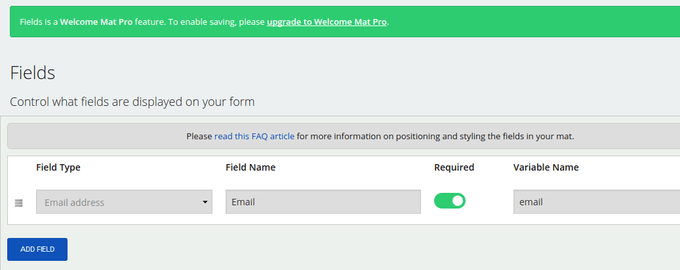
To do so, select the Add Field button and specify the field type you’d like to make. You have the option to make the field required, along with settings for the field and variable names.
Step 5: Make Your Welcome Mat Less Annoying
As we discussed above, some users may find a welcome mat a little annoying. So, it’s nice to not show the welcome mat message to people who have already seen it.
Select the Behavior tab, and choose how long you’d like to NOT show the welcome mat for a visitor who has already seen it. For example, you may remove it for one month if a user has decided to skip over it once. After that month, it pops up again in an attempt to grab that valuable email address again.
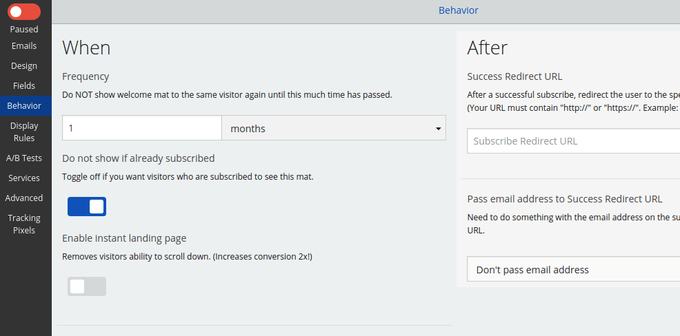
This page also has some handy tools for the following:
- Showing or not showing the mat if someone is already subscribed
- Removing the ability to scroll away from the welcome mat (essentially turning it into a permanent landing page)
- Redirecting to another URL after a subscription
- Getting a notification when someone subscribes to your list
Hit the Save button after you’ve completed this step.
Step 6: Connect With Your Email Service
Quite a few other features are included in the SumoMe solution. For example you can manage A/B tests, display rules, custom code and tracking pixels. However, the final essential tab is called Services.
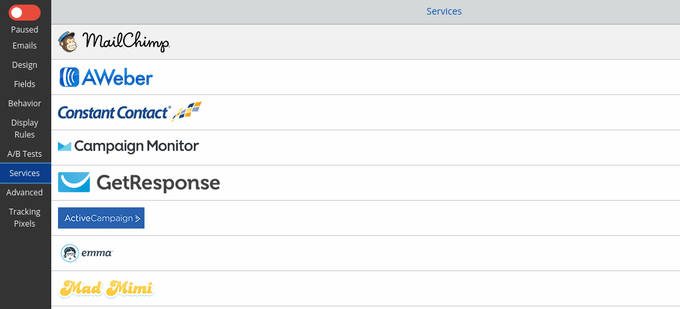
Since you must have an email service to collect your emails, we recommend clicking on one of the options. They have services like MailChimp, AWeber and Constant Contact. You need to have one of those accounts already setup, since it’s just a one-click process where you type in your login credentials.
Step 7: Activate the Welcome Mat
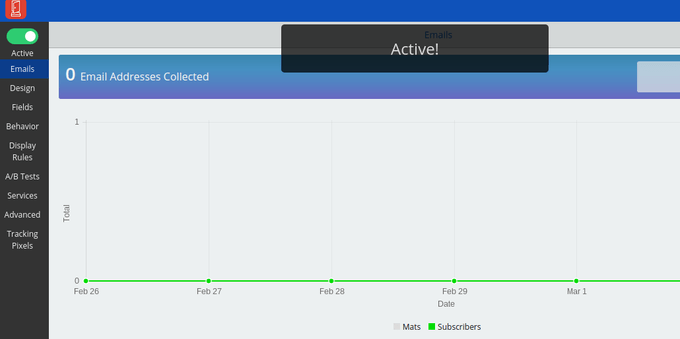
Once you’ve developed the perfect looking welcome mat, navigate to the little switch at the upper left hand corner and click on it. This turns it to green and shows an Active message. Finally, go to the frontend of your site to see what it looks like. We recommend testing it out to see if the email collection tool works out for you. Otherwise, congratulations on making your first welcome Mat!
What Are Some Other Cool Apps and Plugins for a Welcome Mat?
Although not all of these are specifically designed as welcome mats, they work as email subscription popups, call to actions and squeeze pages, allowing for the ultimate welcome to your website.
Do You Have Any Questions About Welcome Mats for WordPress?
Learning how to create a welcome mat for your WordPress site has many advantages, including the ability to present what people can gain from your site, while also improving your conversions. The best part is that you don’t have to pay with SumoMe unless you really want to start improving on your customization options. Even then, it’s pretty darn affordable.
If you have any questions about making your own welcome mat, feel free to leave us a message in the comments section below. Otherwise, let us know what you think about SumoMe and the welcome mat tool.


Thanks for this great walkthrough Eddie. I used it to set-up my first welcome mat on one of my sites. Now waiting to see the results but the first impressions of SumoMe are great.
You welcome Robert. I’m glad it’s been helpful.
Hi,
while the Welcome Mat is still a free tool, the integration with any well known email service has now become a premium feature. This makes it quite useless if you just want to try it out or have a site that does not justify spending $20/month on a sign-up form.
Thanks for this walkthrough. Didn’t want to try the sumome plugin just yet. But after seeing this, I’ll definitely give this a try.
You welcome Enzon. You definitely should.
I am really thankful to the owner of this web site who has shared this fantastic
piece of writing at at this time.
Nice post. Thanks for sharing all the info on welcome mats and conversions.
D’oh! Had been utterly converted by your enthusiastic run through. Then read Martin’s comment about fremium rate for email integration. Shame. But will definitely recommend to relevant clients. Thanks.
Thanks – great walkthrough! Got mine up and running quick following your guide.
You welcome Michelle.
It’s up to $30 a month for just one site now. It’s a shame. Obviously not geared toward startups, for example, as the expense can’t be justified, especially when I have a half dozen sites that could benefit from it. They just won’t benefit THAT much at the start of a career.
Awesome post. Thanks for sharing this info on welcome mats. Will give it a go.